

Did you know that WordPress powers 35.8% of all the websites on the internet? As if that wasn’t enough, it has a 63.2% market share among websites that use a content management system (CMS).
It may have originally started as a blogging tool but has evolved over the years to become so much more than that. It is one of the most powerful website builders and CMSs around.
One of the best things about WordPress has to be just how easy it is to use with little to no coding experience whatsoever. Gone are the days when you had to hire a web developer to create a professional-looking website.
Some of the top brands that use WordPress to power their sites include Vogue, Facebook Newsroom, The White House, The Walt Disney Company, among many others. Yours, too, can join this elite group of sites.
Here’s the ultimate step-by-step guide on how to create a WordPress website.
Step 1: Get Familiar With WordPress
While there isn’t any actual actionable step to take at this point, it’s important to familiarize yourself with the different flavors of WordPress. The tool you want to use is WordPress.org and not WordPress.com
The difference between the two all boils down to who is hosting your website. With WordPress.org, you host your site, whereas WordPress.com is a managed service that doesn’t require a hosting solution.
With that out of the way, the flavor you’ll be using to create WordPress website is the open-source software at the .org extension.
Step 2: Purchase a Domain Name and WordPress Hosting Service

This is where you get to exercise your creative freedom when picking a domain name for your site. But, before you get carried away, just make sure it has the following qualities. It needs to be:
- Easy to spell
- Memorable
- Short
- Unique
- Have niche-related keyword
Once you pick a name, use a domain-checker to confirm that it is available. If it is, purchase it and choose a hosting service. Most of the reputable ones have subscription-based plans that include the domain name in the price. This is more cost-effective than purchasing them separately.
Step 3: Install WordPress
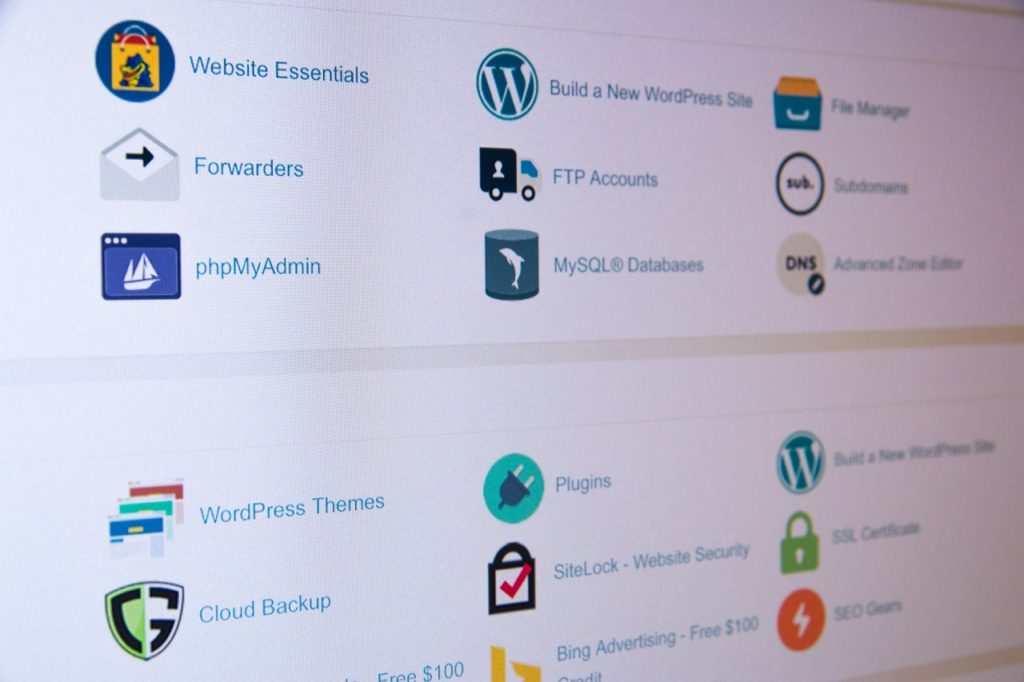
Once your hosting service is ready to roll, the next step involves installing WordPress. This is an easy process as most hosting services have a built-in installation wizard available in the Control Panel (cPanel) dashboard.
Follow the wizard prompts once you’re logged in to your cPanel and installation should complete within a few minutes at the most. Next, you’ll need to click on the WordPress icon on your cPanel to launch the UI. This is where you’ll input the username and password provided by your web hosting service.

Once you successfully log in, the first interface that loads is the Dashboard. Some of the different features you’ll see on this screen include the:
- Welcome message – Has some quick shortcut links for quick access to different parts of your website. The links include:
- Customize Your Site
- Write Your First Blog Post
- Add an About Us Page
- View Your Site
- Manage Widgets or Menus
- Etc.
- Current site status – Gives an overview of what’s going on with it
- Posts – This is where you go to create blog posts
- Media – Here’s where you upload and/or manage all media files like images and videos
- Pages – Use this to create subpages
- Comments – Used to moderate user comments
- Appearance – This where you customize the way things are displayed on your site
- Plugins – Install new WordPress plugins here
- Users – Use this to manage the user accounts that can access the site’s admin panel
- Settings – Takes you to the main site settings
Step 4: Pick a Design / Theme for Your Website
Here’s where the fun part begins! There are thousands of WordPress themes you can choose from. With a single click of a button, you can modify the way your entire website looks using the available interchangeable designs.
Some of the best free WordPress themes you can use include:
- Hestia
- Plum
- Nectar
- Ocean WP
- Atmosphere Pro
- Bento
- Creativo
- Latest
- Spencer
- Astra
Once you pick a theme that you like:
- Go to the “Appearance” menu in your WordPress dashboard
- Select “Add New”
- Input the name of the theme in the search field
- Once it is displayed, click on the “Preview” button to see what it will look like after you install it. If you like what you see, then hit the “Install” button
- Click “Activate” to enable the new theme on your site
If there are certain aspects of the theme that you want to tweak without losing the ability to upgrade it when a new update becomes available, you can use a WordPress child theme.
This is essentially one that inherits all its functionality from another WordPress theme, which, in this instance, is the “parent” theme. So, you can update it without running the risk of losing all the custom changes you had made previously.
Step 5: Customize the Theme
Go to “Appearance” on your dashboard menu and then select “Customize” to launch the customizer interface. Here’s where you can start fine-tuning the different aspects of your website.
These include the:
- Homepage settings
- Background image
- Title and tagline
- Button text
- Frontpage sections like the:
- About
- Blog
- Contact
- Features
- Ribbon
- Subscribe
- Team
- Testimonials
- Etc.
Step 6: Install WordPress Plugins to Enhance Functionality
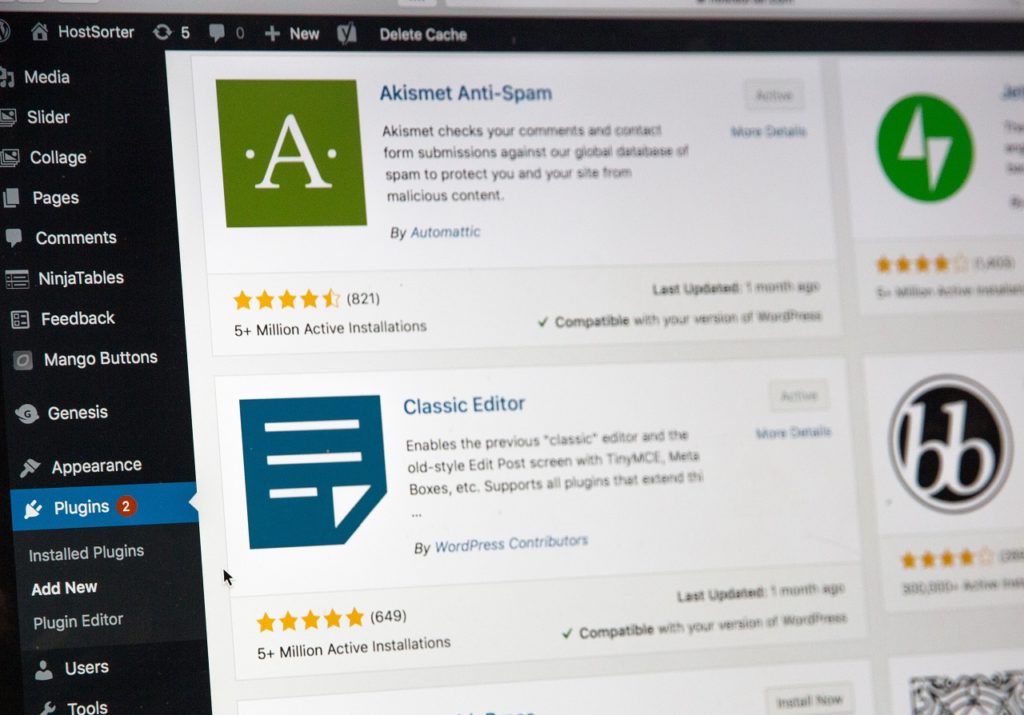
WordPress plugins are like the apps of your smartphone. It’s how you add great features to your website without having to learn how to code. Some of the must-have plugins that are essential to every WordPress website include:
- Yoast SEO – recommends specific changes to make in your site for search engine optimization
- Google Analytics for WordPress – allows you to analyze web traffic to your site
- Wordfence Security – bumps-up your site’s security
- WPForms – allows you to add interactive forms on your website
- UpdraftPlus – provides automatic site backups
Step 7: Create Site Pages
At this point, you’re now ready to add content to your website. To do this, go to “Pages” on your dashboard and select “Add New”. Enter the page title, add media if you have photos or videos you would like to incorporate, and then add the main page content in the body section.
Click “Publish” for your page to go live on your site. Some of the pages you should consider adding include About, Contact, Privacy Policy, among others.
Get a Professional DIY Website
There you have it. That’s how to create a WordPress website. If you’ve followed the seven steps detailed in this guide, you should be looking at a brand new website as we speak.
You can do it yourself without having to hire anyone to help you. WordPress is the most pocket-friendly solution available to create a professional website from scratch.
If it all sounds too complex, you can always get an expert to help.